REVIEW · RIO DE JANEIRO
Paragliding or Hang Gliding Experience in Rio de Janeiro
Book on Viator →Operated by Best Fly Rio Voo Livre · Bookable on Viator
Rio looks different from the sky. If you want a first-class way to see Rio that feels totally unlike the usual bus-and-beach routine, this Pedra Bonita flight turns the shoreline, cliffs, and neighborhoods into something you can actually understand from above, from São Conrado to Pedra Bonita.
I especially like the safety checks (you’ll get equipment inspected and supervised right before anything happens) and the GoPro/360 recording, so you leave with more than just photos of clouds. The main consideration: this is weather-dependent and not every option fits every body, since hang gliding can be restricted for people who have trouble running, with paragliding suggested instead.
In This Review
- Key Things to Know Before You Fly
- From São Conrado to Pedra Bonita: Your Day Starts With Purpose
- What Happens at the Ramp: Registration, Gear, and a Real Training Run
- The 6 Steps, the Count, and the Freedom Moment
- Landing: Stand Up, Touch Down, and Keep It Controlled
- Rio Views From the Air: Where the Route Lines Up With the Icons
- GoPro and 360 Cameras: The Footage Factor That Raises the Value
- Price and Timing: Is $333.25 a Good Deal?
- Hang Gliding vs Paragliding: Choose Based on Running and Weight Limits
- Logistics That Matter: Departure Window, Group Size, and Weather
- Should You Book Rio Paragliding or Hang Gliding?
- FAQ
- How long is the experience?
- Where do I meet?
- What time does it run?
- Do I get video or photos?
- Is hang gliding or paragliding available for everyone?
- What are the weight limits?
- How safe is it right before launch?
- What should I expect during the flight training?
- What if weather is bad?
Key Things to Know Before You Fly
- Pedra Bonita launch feels simple, but the setup is serious, with paperwork, gear fitting, and a supervisor cable check
- Training first, including a practice run described as 520 meters, plus takeoff and landing instructions
- You get recorded from the air, with GoPro and 360-degree cameras capturing your flight
- A calm, patient pilot matters, and Rodrigo is specifically mentioned for clear English and confidence-building explanations
- Small-group vibe, with a maximum of 20 travelers and multiple departure times in the day
- Plan around weather, because if conditions are unsafe, the experience is adjusted with a different date or a full refund
From São Conrado to Pedra Bonita: Your Day Starts With Purpose
This experience is built around one of Rio’s most famous flight areas: the launch ramp at Pedra Bonita. You’ll start on Praia de São Conrado, where you meet the team at the scheduled time near public transportation at Best Fly Rio Free Flight on Av. Pref. Mendes de Morais (São Conrado).
Before you even head uphill, you’ll do the required sport procedures at the flight club. That’s not just bureaucracy. It sets expectations, handles responsibility paperwork, and gets you into the right mindset. Think of it as the calm “gear-up” phase so the jump later feels less like chaos and more like a plan.
You’ll then ride to the ramp in the guide’s car. The drive is short, about 15 minutes, but it matters because it gets you right to the launch site while everything is still organized.
You can also read our reviews of more tours and experiences in Rio de Janeiro.


What Happens at the Ramp: Registration, Gear, and a Real Training Run
Once you’re at the ramp area, training starts immediately. You’ll get explained takeoff and landing procedures in detail, and the team is specific about safety equipment before you’re anywhere near the edge.
Here’s a key detail I like: you don’t just hear instructions and hope for the best. You do a training phase that includes a practice run—described as 520 meters of pure adrenaline. The vibe is “learn the moves, then do the moves,” so your brain has something to do while your body is getting ready.
Next comes the gear. You’ll put on the safety equipment and have it checked. After that, a supervisor performs an inspection of cables and the assembly of the equipment. This repeated verification is a big part of why so many people leave with confidence instead of nerves.
If you’re wondering whether the staff is tuned in to first-timers: yes. The operation is designed to work for both first-time visitors and experienced jumpers, but you’ll still get the same structured setup and coaching. Rodrigo is specifically mentioned in the experience as calm, patient, and good at explaining what you’ll do next, in English.
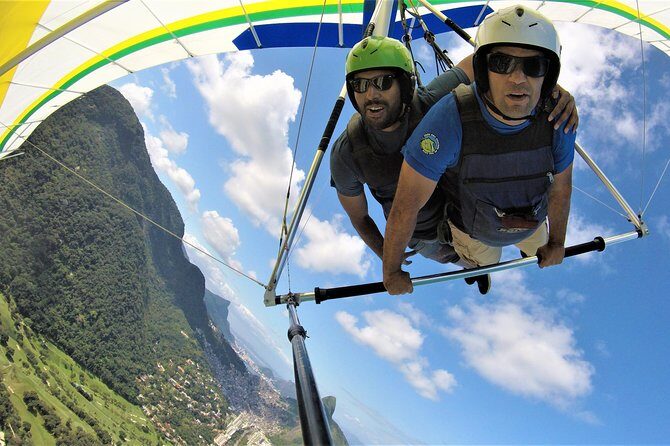
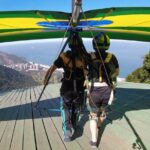
The 6 Steps, the Count, and the Freedom Moment
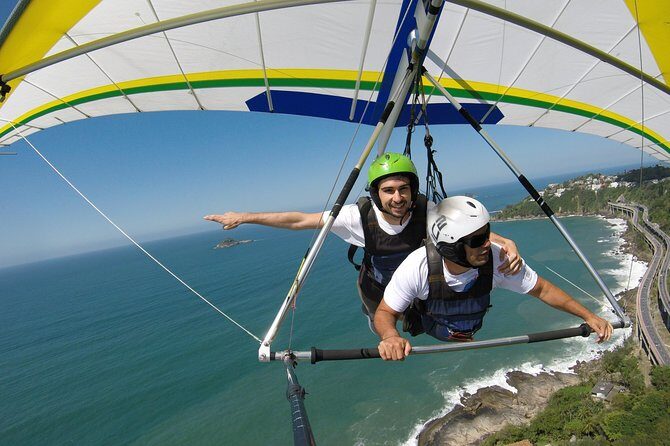
The flight moment is described like this: you’ll look at the horizon, and your guide will ask if you’re ready. Then it’s run around 6 steps, count to three, and go. The instruction is straightforward: you run, you’re guided into position, and then you let yourself go with your arms dropping to enjoy the feeling of freedom.
The important part isn’t theatrics. It’s timing and coordination. That’s why the practice run and rehearsals help so much. If you’re anxious, the “work it out” approach tends to beat the “just jump” approach every time.
You can also expect to be checked by a safety officer on the runway area for bystanders clearance. There’s an extra layer of control before launch, and that reduces the sense that you’re launching into a crowd or guessing what’s happening.
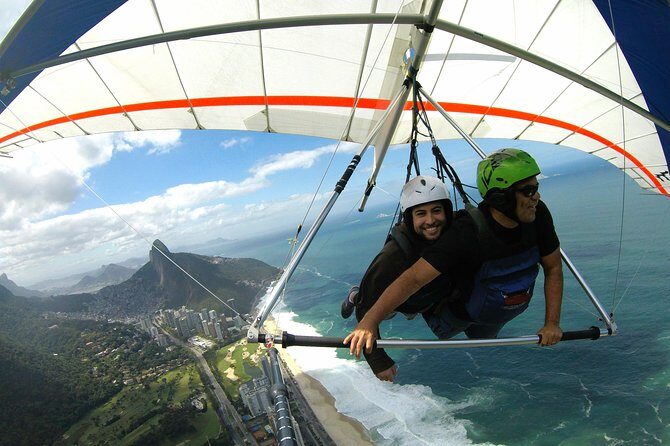
In the air, it’s described as peaceful, with big views and enough control coaching that some people even get to try steering a bit. One solo flyer described trying a small amount of flying/steering during the experience, while still keeping safety as the focus.
And yes, you’ll likely be thinking about your breathing and your eyes. But the GoPro/360 recording means you can also look back later and remember the flight with more detail than you’ll capture in the moment.
Landing: Stand Up, Touch Down, and Keep It Controlled
Landing is where first-timers often worry most. The good news: you’ll get landing instructions during training.
The landing is described in simple terms: you’re told to stand up, and then you land on your feet. One key point from the description is that landing procedures aren’t left to luck. You rehearse what matters so you know what your body should do when it’s time.
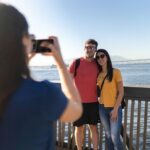
After landing, there’s a short “stay around” phase. People are encouraged to stick with the team while the videos are downloaded, and there’s a snack and drink at the restaurant afterward. That’s more than a nice touch. It gives you time to settle down after the adrenaline, and it’s when you can get your questions answered without rushing.
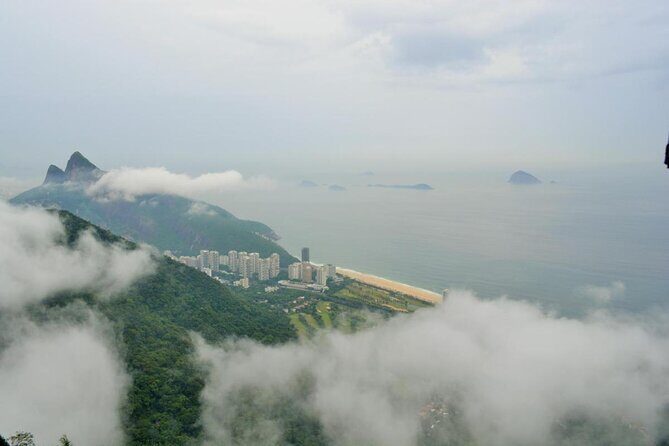
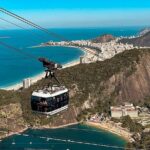
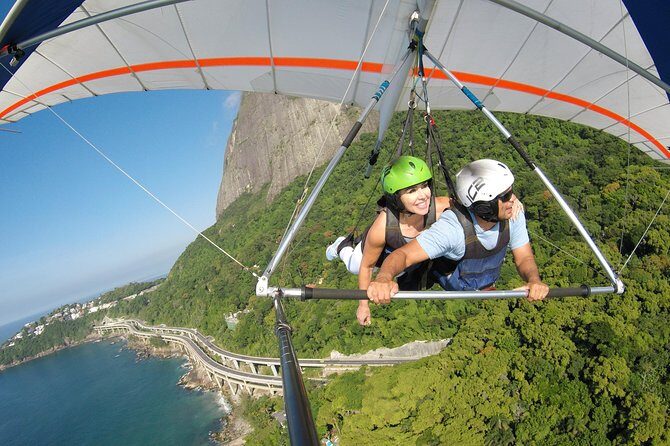
Rio Views From the Air: Where the Route Lines Up With the Icons
You’re flying over one of Rio’s most photogenic regions. Even if you’re not a “I know all the names” type of traveler, you’ll feel the geography quickly.
From the flight area and the surrounding sightseeing stops, the day connects classic Rio landmarks:
- Pedra da Gávea, a dramatic cliff area people recognize on sight
- Floresta da Tijuca, the famous forested region that changes the feel of the city fast
- Morro Dois Irmãos, another iconic viewpoint shape near the coast
The itinerary also includes stops that help frame what you’re seeing from the ground before and after the flight. That matters because it turns the experience from random beauty into something you can connect to a map in your head.
If you’re a repeat Rio visitor, this is also a smart “new angle” option. You’ve seen the beaches and lookouts. From the air, the whole city pattern makes more sense. And for first-timers, it can feel like skipping a few steps of “where am I?” because the views are so broad.


GoPro and 360 Cameras: The Footage Factor That Raises the Value
A lot of activities sell the thrill. This one adds something useful: you’re recorded.
GoPro and 360-degree cameras are used to capture the flight. That changes the outcome of your day. Instead of only relying on memories (which are good, but blurry when you’re focused on safety and sky), you get a story you can replay.
If you care about sharing the experience later, or you just want evidence that the jump really happened (because it can feel unreal), the camera package is a strong reason to choose this over a purely scenic alternative.
Also, you’ll have time to stay afterward while your media is downloaded. That reduces the usual “wait for links and hope they send them” stress.
Price and Timing: Is $333.25 a Good Deal?
The listed price is $333.25 per person, and it’s typically booked about 14 days in advance. Duration is about 1 hour (approx.), which is short enough to fit into a packed Rio itinerary, but long enough to include training, the checks, the flight, and the media download.
Now, here’s how I think about value for this kind of experience:
- You’re not just paying for air time. You’re paying for a supervised setup, equipment inspection, and coaching.
- You’re paying for recording (GoPro and 360 footage).
- You’re getting a spot in a small operation capped at 20 travelers, which usually means less “herd control” and more one-on-one attention.
One review mentioned paying about 200 reais (around USD 36) for a similar experience, which suggests pricing can vary based on timing or what’s included in the moment. I can’t promise why the difference exists, but it’s a reminder to double-check what your final package includes at checkout and compare similar flight options.
Bottom line: if you want the most complete Rio thrill package—views plus coaching plus footage—this can feel like solid value. If you’re only after a quick sightseeing break, you might feel it’s pricier than a lookout.
Hang Gliding vs Paragliding: Choose Based on Running and Weight Limits
This is where you’ll want to read the fine print and then match it to your body and comfort level.
The experience mentions flying in a delta wing with people up to 85 kg, depending on height and wind. Parachute flights go up to 110 kg. If you’re within those weight ranges, you’re likely eligible, but the final decision still ties to conditions and the guide’s assessment.
It also notes a key suitability point: restricted hang gliding for people with difficulty in running. In that case, paragliding is suggested. That’s important because launch involves a short run and quick coordination. If running is hard for you (or you’re not confident with it), ask ahead which option fits you best.
If you’re traveling solo, this also works well because you’re paired with a guide pilot and have a clear script. If you’re traveling with family or a friend, it can also make sense since some people can choose hang gliding while others choose paragliding, depending on fit.
Logistics That Matter: Departure Window, Group Size, and Weather
Departure times are available throughout the day, and the location is close to public transportation. Opening hours are listed for Monday through Thursday, 8:00 AM to 3:30 PM.
But the real wildcard is weather. The experience requires good conditions. If it’s canceled due to poor weather, you’ll be offered a different date or a full refund. That flexibility is good news because Rio skies can change fast.
Practical advice: don’t schedule this as a “must happen at exactly this time” moment if your itinerary is tight. Give yourself room to shift.
Also note the experience is capped at 20 travelers. Smaller groups usually mean less waiting and fewer people to coordinate. It’s not silent and private, but it feels more like a guided sports session than a mass attraction.
Should You Book Rio Paragliding or Hang Gliding?
If your goal is a genuine Rio memory that feels different from the usual viewpoints, I think you should book. The reasons are simple: the structured training, the supervisor cable inspection, the clear launch process, and the GoPro/360 recording.
It’s especially worth it if:
- You want first-rate views without needing expert knowledge of Rio
- You like having proof of the experience on camera
- You’re nervous about “jumping off a cliff” and want clear coaching (Rodrigo is specifically mentioned for English and calm instructions)
Skip it or consider paragliding instead if:
- Running is difficult for you, since hang gliding can be restricted
- You hate weather-dependent plans and won’t be able to reschedule
If you’re on the fence, pick a day with decent forecast and plan it as a priority activity. This is the kind of thing you remember when the rest of the trip starts blending together.
FAQ
How long is the experience?
It’s about 1 hour (approx.) from start to finish, including training, the flight, and the time for video download afterward.
Where do I meet?
You meet at Best Fly River Free Flight, Av. Pref. Mendes de Morais, 1505 – São Conrado, Rio de Janeiro – RJ, 22610-095, Brazil.
What time does it run?
Departure times are available throughout the day. Opening hours listed are Monday to Thursday from 8:00 AM to 3:30 PM.
Do I get video or photos?
Yes. Your flight is recorded with GoPro and 360-degree cameras, and you’ll stay afterward while the videos are downloaded.
Is hang gliding or paragliding available for everyone?
Hang gliding may be restricted for people who have difficulty running. If that’s your situation, paragliding is suggested.
What are the weight limits?
The delta wing has a limit of up to 85 kg, depending on height and wind. The parachute option is up to 110 kg.
How safe is it right before launch?
After training and equipment fitting, a supervisor inspects cables and the assembly of the equipment for safety.
What should I expect during the flight training?
You’ll learn takeoff and landing procedures, do a training run (described as 520 meters), put on safety gear, and then get a final equipment check by a supervisor.
What if weather is bad?
The experience requires good weather. If it’s canceled because of poor weather, you’ll be offered a different date or a full refund.